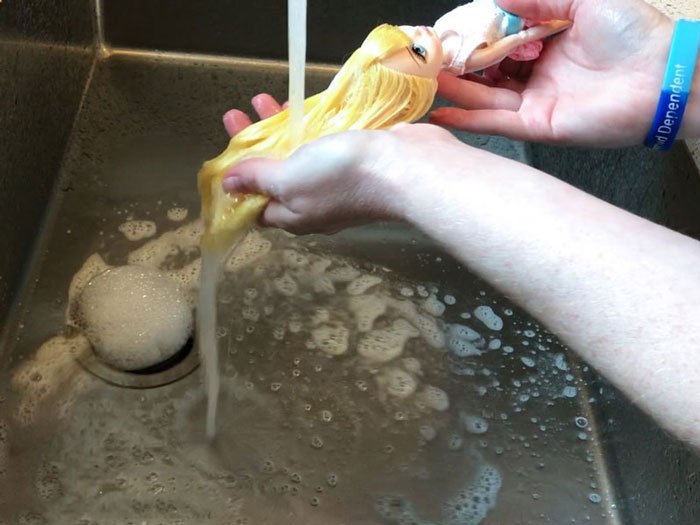
I hope you’re ready to get wet because today I am going to show you how to wash your doll’s hair plus style it into an adorable bow!
“Which lucky doll will be the recipient of this new do?” you ask.
Everyone, meet Blondie Locks from Ever After High’s Through The Woods collection.

I am still (slowly) trying to finish up my Ever After High collection, and Blondie Locks was another character I hoped to get. However, poor Blondie came with a bad case of messy box hair.


You can see here where some glue has leaked onto the hood of the cape.
So, instead of doing another review, Blondie is going to make her debut by getting a hair wash and cute style:
Supplies Needed:

1. A comb.
2. Warm water (not boiling).
3. Shampoo or conditioner.
4. A towel
- Start by wetting your doll’s hair with warm water. There is no need to boil wash it. Lukewarm water works just fine.

- Once your doll’s hair is completely wet, add a dime-sized portion of shampoo to the hair.

I am using regular shampoo here. Nothing fancy–just whatever brand I happened to buy last time I was at the store.
The main thing to remember when washing doll hair is to avoid using hand soap or dishwashing soap. Hand soap will dry the hair out and leave it looking dull. Shampoo or conditioner is a better choice because it cleans the doll’s hair without stripping away its shine.
Alternatively, if you would rather not wash your doll’s hair you could try sprinkling it with baby powder to remove grease. I have never used this method and have no idea how well it works but have seen it done on YouTube and heard it is a great way to get rid of glue that has seeped into doll hair.
- After rubbing the shampoo in, and thoroughly saturating all the icky bits with suds, rinse the hair until the water runs clear and all the shampoo is out.

- Use a towel to dry the doll’s hair, then gently comb through it to remove any tangles.

When you’re combing the hair, try to start at the bottom and work your way up to keep from pulling out too many strands.
Now, your doll has clean, grease-free hair!

Blondie’s hair looks so much better after being washed. It’s soft, shiny, and (most importantly) not sticky!
I’m going to set Blondie aside and let her hair dry out a bit more before starting on the Bow style.
…about 30 minutes later.

Okay, Blondie’s hair has had time to dry. It’s still slightly damp but totally ready for styling, so let’s get to work on the Bow!
Supplies Needed:

1. A comb
2. Elastic hair bands–I am using these tiny, clear elastic bands I found at Wal-Mart. I prefer clear bands because they blend in better with the doll’s hair.
- To give your doll a Bow style, separate a section of hair from either side of your doll’s head. Try to keep these pieces as even as possible.

- Pull the sections to the back and tie the hair into a simple bun using a clear elastic band.

- Next, split the bun down the center to turn it into a bow.

After dividing the bun, you should have two loops of hair–one on the left side and one on the right. Pull the loops tight and you’re done!

You can leave it like this; however, since I’m a perfectionist and feel this Bow needs some tidying up, I am going to secure the loops of the Bow to Blondie’s hair using a needle and thread.

Notice I am NOT actually sticking the needle into Blondie’s head (ouch!). I am very carefully sliding it between the strands of hair so I can pull the loops closer to her head. When I was younger, I used a similar technique when plaiting my horse’s mane before a show.
Once you’re happy with the bow’s positioning, knot the thread and snip off the ends. Then tie a pretty ribbon around the bow to hide the elastic band.

Now take a step back to admire your work!

I am loving the Bow!

If I remember the episodes correctly, Blondie has a happy, bubbly personality and I wanted her new hairdo to reflect that. I think I achieved my goal?.

You can see that washing doll hair doesn’t have to be a complicated process. Just use products you already have on hand to fix your doll’s sticky or matted hair and give her a lovey coiffure!

I sure hope you had as much fun reading this tutorial and seeing Blondie’s pretty pictures as I did making it.
Also, be sure to visit out our new Polls page before you leave. That’s right, we have a brand-new set of polls up and waiting for you to cast your votes in! These polls only last for a month, though, so please check them out and share your opinions before they expire.


Blondie’s hair looks amazing!:)
-Quinley
Thanks! It was fun to do a hair tutorial for a change.